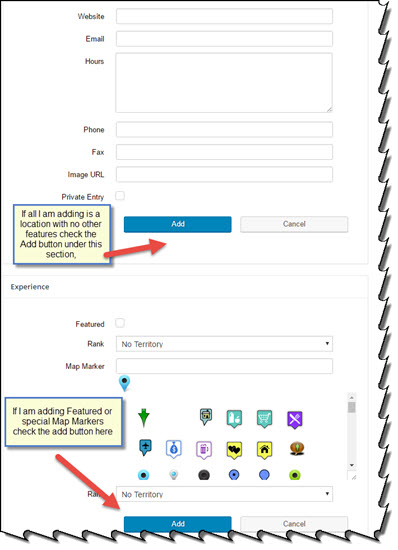
If you have any of the Store Locator Plus featured Add-ons such as Power, Experience, or Premier add-ons , or if you have the MySLP Saas Professional or Enterprise level plan you will see additional sections when Adding (or managing) a Location.
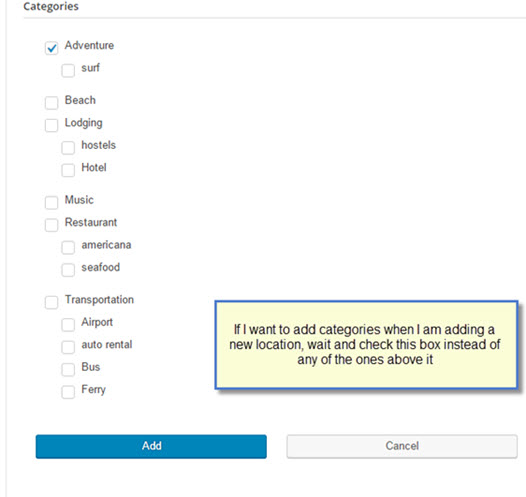
You can opt to fill in all the rows and info that determine the Location and geocoding and hit Add button if you are done entering information. Or you can opt to continue to the next section, whether it be featured, tags, categories, or other functions that are in separate sections on the Location Add Tab.Click the “Add button” at the bottom of the next section instead.
For example, I want to add a location that also is going to have a category assigned to it. I have the latest version of the Power Add-on activated. After adding all the Location information, I do not click on the Add button under the location information but continue on down to the next section called “Power” and add whatever pertinent information I wish to add there. Once I am satisfied and have no additional data to add, I click on the Add Button under the Power section of the Locations Panel to create the location that I have just added.
The category or other additional data you just associated will appear when you review the Locations Page.