Adding Locations with additional features

If you have any of the Store Locator Plus featured Add-ons such as Power, Experience, or Premier add-ons , or if you have the MySLP Saas Professional or Enterprise level plan you will see additional sections when Adding (or managing) a Location.

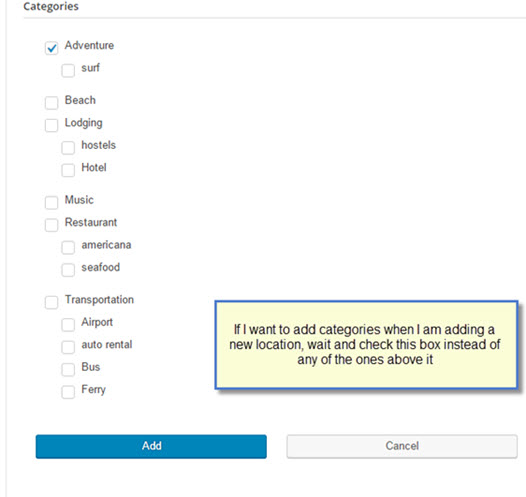
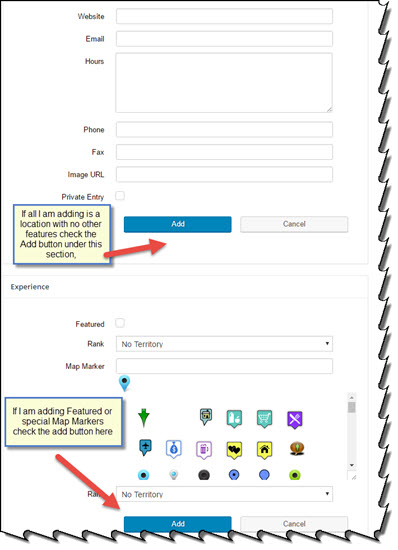
You can opt to fill in all the rows and info that determine the Location and geocoding and hit Add button if you are done entering information. Or you can opt to continue to the next section, whether it be featured, tags, categories, or other functions that are in separate sections on the Location Add Tab.Click the “Add button” at the bottom of the next section instead.

For example, I want to add a location that also is going to have a category assigned to it. I have the latest version of the Power Add-on activated. After adding all the Location information, I do not click on the Add button under the location information but continue on down to the next section called “Power” and add whatever pertinent information I wish to add there. Once I am satisfied and have no additional data to add, I click on the Add Button under the Power section of the Locations Panel to create the location that I have just added.

The category or other additional data you just associated will appear when you review the Locations Page.When to click the add buttonaddlocationa nd acategories

How to Export Locations to CSV file

Bulk Export

You must have the MYSLP/Professional level or the WPSLP plug-in with the Power add-on .

  1. Go to the Store locator Plus side bar menu, select the Locations tab
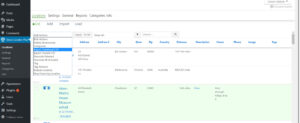
  2. Select from the drop down  menu under BULK actions , select export  Download to CSV.
  3. You may select  the locations by clicking either individually and Apply  or click on the action bar and select the Apply /  ALL button or you may  filter what you wish to export. Screenshots, the first one is the Plug-in  menu
    Above shown is the WPSLP plug-in with Power add-on
    SLP SaaS bulk export with Professional level plan

    SLP SaaS Action bar to check off All

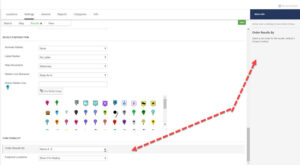
Results Order by display

The Store Locator Plus default is to show the order of the  results below your map by distance, i.e. closest to the searched address  listed first.   With the Experience Add-on or the Premier Add-on the  “order by” options  allows you to display the results in a different order.  With the Experience add-on (if you are using WordPress SLP) or the Professional Plan (if you are using the MySLP Subscription) the results order by options  are  under your Settings/Results/Panel

  • Closest list the closest to the search address or center of the map (this is the default)
  • A..Z- alphabetical sort of locations.alphabetical sort of locations
  • Random- random order of locations, changes on each search
  • Featured, Rank, Closest
  • Featured, Rank, A..Z
  • Featured, Closest
  • Featured, A..Z
  • Rank, A..Z
  • Rank, Closest

    Experience add-on allows you to change the order of the results


Radius Behavior

Store Locator Plus  Radius Behavior is set to “always use” in the base plugin or Advance level subscription for SLP SaaS

For additional options you would need Professional level  and /or higher for MySLP/SLP SaaS  or the Experience add-on for the WPSLP plug-in  which allows you to extend the functionality beyond the basic “Always Use” setting.  This setting impacts how the radius selector is employed and how locations are filtered before being displayed to the user.

The map radius is set under the Settings /Search tab and the results (after search) is found under the Settings/Results tab”Initial Search radius”.  The search radius selection options presented to the user in the drop down menu is set under the Settings / Search tab  panel.

How to upload and install your Word press Store Locator Plus and Add-Ons

Obtaining SLP  Add On Pack

Note  This page does not apply to our SLP SaaS subscription customers.   All updates for those customers are taken care of by us.  SLP SaaS is also referred to as MySLP. It is not a plug-in.  It is a managed Software service.  No need to worry what version you are on.

All add-on packs are available from the WordPressStore Locator Plus website.   Power Add-On ,  Experience Add-on , or you can purchase a Premier Subscription that provides access to all of the add-on packs as well as preferred access to the Premier support forums, pre-release products, new features and functionality that is  available only to subscribers.

Note: If you purchase the  Power or Experience add-ons as an upgrade to your existing  (Legacy) add-ons, the legacy add-ons will automatically be deactivated. Delete the legacy add-ons.  First “always have a full backup of your site”  We strongly recommend looking into the WordPress backup, or   Jet Pack.   One of the features included , besides real-time incremental backups of your site with restore points, is the ability to restore the site to an alternate site

<!–more–>

Install An Add On Pack

SLP version 5.10 and above are not listed in the WordPress Plugin Directory.    Ditto any add-ons you purchased from our Store front . As such the first time you add the plug-in it will  need to be installed via the below  installation process.

  • Login To Your Store Locator Plus  Account
  • Download the latest zip file version
  • Login to your WordPress admin panel for your website.
  • Go to the plugins sidebar menu.
  • Select Add New.
  • Select Upload.
  • Browse to your downloaded zip file.
  • Click Install now.
  • Activate

Updating An Add On Pack

Once installed a query from the WordPress Admin Panel communicates with the Store Locator Plus servers and a message  or red line will be shown as updates are available.  Occasionally, the WP server times out before it gets to the SLP plugin servers. Use the check again tool in the WP Admin sidebar or check the versions at the Store Locator Plus home page.
WP check again

Some third-party plugins and WordPress themes can prevent the update notice appearing from the Store Locator Plus server.   It is prudent to visit the Versions Page and only if necessary, perform a manual update.  

You should perform updates on your test site or a staging site first to avoid downtime or potential  issues effecting your production (live) site. You should always have a recent back-up to restore to. The safest way to do manual updates, follow these steps

Deactivate the plugin you are updating
Delete the plugin
Go to Plugins | Add New
Select Upload
Upload the latest release zip file
DO NOT click the Activate button
Go to Plugins on the sidebar
Check off the plugin you just installed
Go to bulk actions and select activate

Adding Radius Selection First Entry

If you have the  WPSLP Experience Add On or the MYSLP/Professional plan   an additional setting is available under labels and will show you a new field named Radius first entry under the Settings/Search user interface.   When a Radius First Entry has been set it will appear as the first field  in the radius drop down that the user sees on your search form.   The value will be set to the default miles that you have set in Radii Options. The other radiis you have entered to allow users to search will appear in numerical order in the dropdown but the label for the first entry will appear first regardless of numerical order.

Additional Search Layout Shortcodes and Attributes

You must have the Experience Add-on   to change the Search Layout appearance, and along with other add-ons,  also allow you to to use the shortcode on  SLP WP page.

These  shortcodes only apply to the Search Layout admin setting when you have the appropriate  Add-on installed and activated.

slp_search_element

This shortcode provides a simple mechanism to place standard search form elements on a custom search form layout, including the wrapping divs and classes around labels and input fields.

button Attribute

Places a search form button on the search form.

Selecting and Customizing your Style

Store Locator Plus Appearance

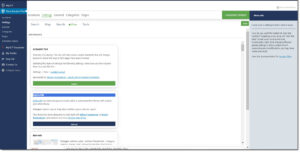
Store Locator Plus comes with a variety of styles to provide a basic style framework that will attempt to match your locator page to various WordPress themes  installed on your site. You can see the list of  Locator Styles under  the Store Locator Plus Settings / View panel. The inner slide bar will show you more.

SLP SaaS view

Location Imports

Location Imports are handled via a CSV file for users that signed up for the MySLP Professional  SaaS service or are using the WPSLP Power Add On with Store Locator Plus plug-in for Word Press current version. With MYSLP the import feature is under the StoreLocatorPlus sidebar/locations as shown in screenshot. If you are using WPSLP self managed and have the Power add-on it will look similar.

CSV Import Format

Getting the proper CSV format can be a challenge when using spreadsheet apps like Excel or Numbers.  Here are some tips to getting a valid CSV format out of a spreadsheet app:

  1. Make sure you always have a header row.  That tells the import process what data is in each column.   The column headers have meaning, so be precise.
  2. When a cell is a text field that STARTS WITH A LEADING ZERO, make sure you explicitly mark the cell as text.   The easiest way to do this is to type a single apostrophe then the number when adding data to the cell as in ‘01886 for the zip code 01886.
  3. Always export with UTF-8 support enabled.
  4. Export to a CSV format.  Comma delimited not tab delimited and quoted strings if given the option.

Check out the Example CSV Imports post to get some usable import files you can play with.